Summary
- Assessment & Design: We usually begin with a free site survey to check your roof integrity and orientation. We’ll also check your electrical setup, making sure the final system is custom-built for your needs.
- Paperwork: Your installer will handle the paperwork. This includes securing your SEAI grant and submitting the NC6 form to ESB Networks so you can sell surplus power back to the grid.
- Quick Installation: The physical work usually takes just 1–2 days. This includes mounting the panels securely, installing the inverter and setting up optional battery storage or hot water diverters.
- Activation: Once installed and tested, a final BER assessment should be done to get your grant payment.
Ready to Ditch the High Bills? Your Journey to Solar Starts Here!
Despite the occasional gloomy day, solar energy is proving to be one of the smartest investments Irish homeowners can make. It’s a game-changer, slashing those eye-watering electricity bills and dramatically shrinking your carbon footprint.
If you’re reading this, you’ve probably already made the decision to go green and save money, which is brilliant. However, you might also be feeling a bit overwhelmed by what happens next. The thought of scaffolding, paperwork, and technical jargon can put anyone off. Trust us, it’s far simpler than you think!
The solar panel installation process, when managed by professionals, is remarkably smooth and efficient. It’s a structured journey from initial chat to flicking the switch on your own clean, renewable power source.
Here at Solar PV Panels Ireland, we’ve perfected the process to make it as hassle-free as possible for you. By the end of this guide, you’ll know exactly what to expect when you take the leap into solar PV.
Phase 1: Getting the Ball Rolling – Initial Assessment and Design
The first phase is all about gathering information, understanding your needs, and ensuring your property is perfectly suited for a solar PV system. This foundational stage ensures the final installation is as efficient and cost-effective as possible.
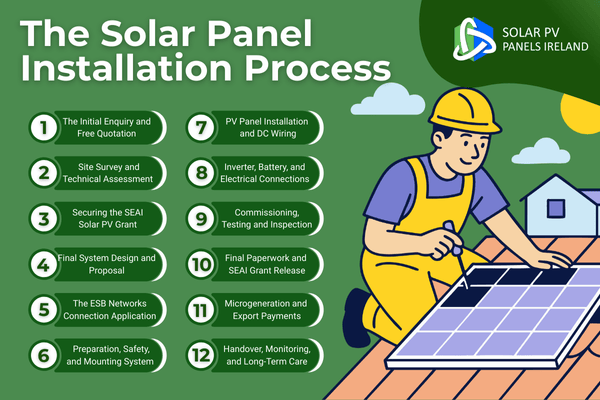
Step 1: The Initial Enquiry and Free Quotation
It usually begins with a simple phone call or a submission on our company’s website. You’ll provide some basic details about your home, such as your electricity usage (often found on your bill), the size and type of your roof, and whether you’re interested in a battery storage system.
Step 2: The Detailed Site Survey and Technical Assessment
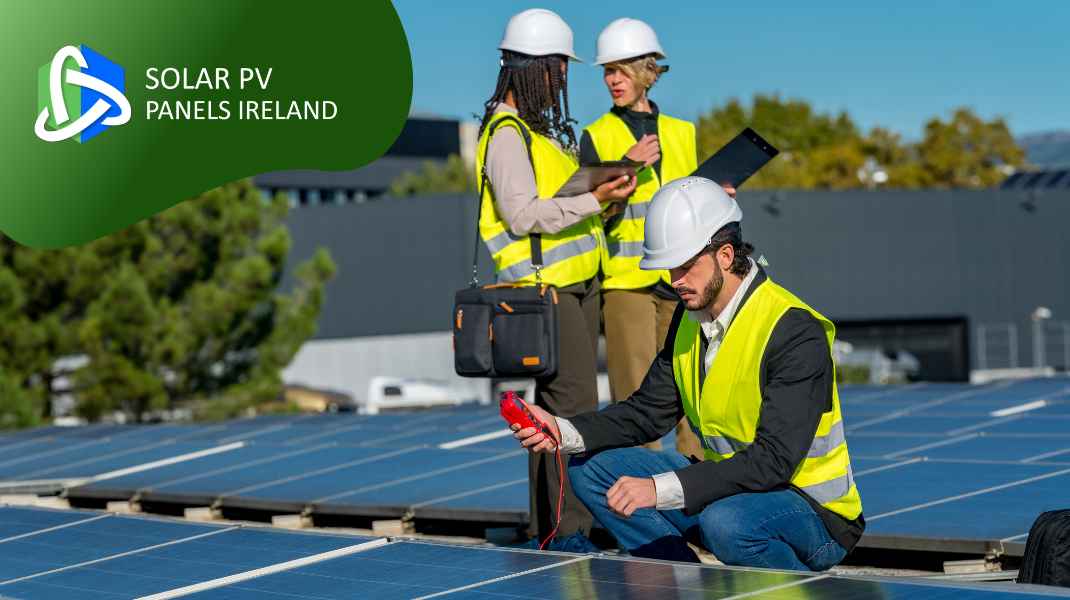
Once you’re happy with the estimate, the next step is a deep dive, the site survey. This is essential for turning a theoretical design into a practical one. One of our engineers will visit your home, usually taking no more than an hour or two, to perform a meticulous check of your roof and electrical setup.
What they look for:
- Roof Integrity and Pitch: They confirm the structural suitability of your roof, checking the material (slate, tile, metal, etc.) and the angle (pitch).
- Orientation and Shading: This is crucial. While south-facing roofs are ideal, panels facing east and west can also be highly efficient, generating power earlier and later in the day. The engineer will meticulously check for anything that casts a shadow, such as chimneys, neighbouring trees, or adjacent buildings, as even a small shadow can significantly impact a panel’s output.
- Electrical Setup: They examine your existing consumer unit (fuse box) to determine the best place to install the inverter and how to connect the new PV system safely.
This survey finalises the perfect layout and system size, guaranteeing that your solar panel installation is tailored specifically for your home and lifestyle. It’s the difference between a decent system and a top-performing one.
Phase 2: The Paper Trail – Securing Funding and Grid Approval
The second phase is often the one that scares people the most, but this is where an experienced installer truly earns their stripes. In Ireland, there are specific hoops you need to jump through to secure grants and legally connect to the grid, but your chosen installer handles most of the work.
Step 3: Securing the SEAI Solar PV Grant
The Sustainable Energy Authority of Ireland (SEAI) offers a fantastic grant to help reduce the cost of your solar PV system. Currently, homeowners can receive up to €1,800 (or more, depending on the most recent scheme updates) towards their installation, which makes going solar more affordable than ever.
Crucial Point: You must apply for and receive your Letter of Offer for the SEAI grant before any physical work starts on your property. This is non-negotiable!
Your solar PV installer will guide you through this application, ensuring all the necessary technical details are included. Once the SEAI approves your application, you receive the grant offer, and only then can we officially schedule the installation.
Step 4: Final System Design and Proposal
With the site survey complete and the grant confirmed, we present the final, fully engineered design. This isn’t just a layout; it’s a technical blueprint detailing:
- The exact number and type of solar panels.
- The model and specification of the inverter.
- The inclusion of a diverter (which sends excess energy to heat your water tank) and/or a battery storage unit.
- The expected increase in your Building Energy Rating (BER) after installation.
This is the contract stage, and once signed, it gives us the go-ahead to order the components and book a date for the physical installation, which is arguably the most exciting part!
Step 5: The ESB Networks Connection Application (The NC6)
Because your solar PV panels will not only power your home but also send any excess power back into the national grid (a process known as microgeneration), you need permission from the Distribution System Operator, which is ESB Networks.
For most domestic installations (which fall under the Micro-Generation category, typically up to 6kVA for single-phase systems), your installer handles this by submitting the NC6 Notification Form. This step is vital for ensuring grid safety and, crucially, for getting paid for the energy you export. The ESB needs to approve the connection before commissioning.
Phase 3: Installation Day – The Physical Transformation
This is the day the real change happens! A well-organised installation team will usually complete a standard residential solar panel installation in just one or two days, depending on the system complexity (e.g., adding a battery or working on a particularly challenging roof).
Step 6: Preparation, Safety, and Mounting System Installation
Safety comes first. The day begins with the safe erection of scaffolding or the use of appropriate safety access equipment. The team will then start work on the roof itself.
- Marking and Measuring: The installation team marks out the precise location of the array according to the approved design.
- Fixing the Brackets: Specialist brackets, designed specifically for your roof type (tile, slate, etc.), are securely fixed to the roof rafters. This is where quality materials matter, these brackets need to stand up to the Irish weather for decades.
- Installing the Rails: Long aluminium rails are then attached to the brackets. These rails are the framework upon which your new panels will sit.
Step 7: The PV Panel Installation and DC Wiring
With the mounting frame securely in place, the team cracks on with installing the solar PV panels. Each panel is carefully lifted onto the roof, positioned, and clamped securely to the rails. They are then linked together in strings using weather-proof DC (Direct Current) cables.
The wires are neatly run down through the roof space, usually through a strategically placed access point, and routed towards the planned location of the inverter, which is often in an attic, garage, or utility room. Minimal disruption inside the house is the goal here!
Step 8: Inverter, Battery, and Electrical Connections
While the roof team is busy installing the panels, a certified electrician on the ground is working on the internal components:
- Inverter Installation: The heart of the system, the inverter, is mounted in its permanent spot. The DC cables from the panels are connected to it.
- AC Connection: The inverter is then connected to your home’s main consumer unit (fuse box) via a new AC (Alternating Current) circuit breaker, ensuring the power generated is safe and compatible with your appliances.
- Battery Storage (If Applicable): If you opted for a solar battery, it is installed, often near the inverter. This system manages when to store excess power and when to release it.
- Immersion Diverter (If Applicable): A clever little device that detects surplus energy and redirects it to your immersion heater, effectively giving you ‘free’ hot water, a brilliant feature for any Irish home!
Step 9: Commissioning, Testing, and Inspection
Before the team packs up, rigorous testing must take place. The entire system is commissioned, which involves:
- Checking all electrical connections and continuity.
- Testing the system to ensure the inverter is operating correctly and safely converting power.
- Verifying that the anti-islanding protection (a safety feature required by ESB Networks) is fully operational.
- Measuring the actual output of the system to ensure it matches the design specifications.
Only once these tests are passed and the Safe Electric Ireland standards are met is the system ready to go.
Phase 4: Flipping the Switch – Post-Installation Life and Maintenance
The installation is physically complete, but there are a few final, administrative steps that turn your solar panels from a rooftop fixture into a functioning, income-generating asset.
Step 10: Final Paperwork and SEAI Grant Release
With the installation signed off, your installer has to prove to the authorities that the work was done correctly. This involves submitting several crucial documents:
- Declaration of Works: A formal statement confirming the installation was completed to the highest standards and grant specifications.
- Completion of NC6: The installer sends the final completion certificate to ESB Networks.
- Post-Works BER Assessment: You must have a new Building Energy Rating (BER) assessment completed. This assessment confirms your home’s energy efficiency improvement, which is a requirement for the SEAI grant.
Once these documents (including the new BER) are submitted to the SEAI, the grant payment is typically processed and sent directly to you, the homeowner.
Step 11: Activating Microgeneration and Export Payments
After ESB Networks accepts the final paperwork, they officially register your Microgenerator on the grid. Crucially, they may also need to install or activate a smart meter if you don’t already have one that can measure exported power.
Once the ESB connection is finalised, you can then set up an arrangement with your electricity supplier to avail of the Clean Export Guarantee (CEG) tariff. This is where you get paid for every unit of surplus electricity your panels send back to the grid, money straight back into your pocket! This is a pivotal step that transforms your PV system from just a cost-saver into a revenue generator.
Step 12: Handover, Monitoring, and Long-Term Care
The final step is the comprehensive handover. Your installer will walk you through your brand-new system, showing you how to monitor its performance. Most modern systems come with an app that allows you to track generation, consumption, battery levels, and exports in real-time. This is essential for maximising your usage and ensuring everything is running smoothly.
A quality system requires very little maintenance, often just a yearly visual check, but it’s comforting to know who to call if you ever have a question.
The Future is Bright
From the first assessment of your roof’s orientation to the final sign-off with ESB Networks, an approved, reliable installer manages the entire process for you. Your job is simply to enjoy the incredible benefits, watching your electricity meter spin backwards, knowing you’re protected from rising energy prices and contributing to Ireland’s collective commitment to renewable energy.
This installation is more than just a home improvement; it’s an investment in a cleaner planet and a green future. The typical process, including the grant and connection approvals, usually takes a few weeks from the initial deposit to final commissioning, but the installation itself is quick, clean, and highly professional.
If you’re ready to join the thousands of Irish homeowners already benefiting from solar energy, don’t delay. Start your journey today!